Showing posts with label Recipes. Show all posts

Monday, April 3, 2017

What's cookin': Swedish meatballs

It's been awhile since I've posted a recipe and I'll say that in this season of life I'm not necessarily cooking food that warms my personal soul, I'm currently all about quick and easy meals that everyone will eat. I'd add "with minimal complaining", but who I am kidding? With an almost 6 and 4 year old, there's something wrong with anything I put in front of them; whether it be how I sliced the apple, the need for more or less sauce, or the fact that my telepathy didn't know they needed their back scratched while eating ... insert eye roll : )

I'm loving the recipe videos floating around on the internet these days and saved this recipe a few weeks ago because it's right up Mike's alley and figured that worst case, the girls would eat plain noodles. Much to my surprised they both actually liked both the meatballs and the noodles! I made the meatballs in advance and the meal itself came together quickly, but did require me to be at the stove most of the time.

Swedish Meatballs
from Tasty

For the meatballs:
1 pound ground beef
½ cup seasoned bread crumbs
½ finely minced onion
1 egg
½ tablespoon salt
½ tablespoon pepper
2 tablespoons canola oil

For the sauce:
2 cups beef broth
2 cups milk
½ tablespoon salt (for sauce)
½ tablespoon pepper (for sauce)
1 tablespoons Worcestershire sauce
4 cups egg noodles
1 cup shredded Parmesan cheese
½ cup chopped parsley

In a large bowl, combine the ground beef, breadcrumbs, onion, egg, salt, and pepper, (I added a couple dashes of Worcestershire sauce) mixing until evenly combined. Heat the canola oil in a pot over medium-high heat. Take about a golf-ball size of the meatball mixture and roll it into balls. Place the meatballs into the pot, cooking for one minute. Flip the meatballs.


Add the beef broth, milk, salt, pepper, and Worcestershire sauce and give it a stir. Bring the liquid to a boil, then add the egg noodles. Stir constantly until the pasta is cooked and the liquid has reduced to a sauce that coats the noodles, about seven to eight minutes. Add the parmesan and the parsley, stirring until the cheese is melted. 

Picture courtesy of Tasty

Tuesday, August 9, 2016

What's cookin': A whole lotta freezer meals


We're getting ready to have a baby around here and part of my pre-baby preparation has always been making a few freezer meals that are ready to pop in the oven or slow cooker so that things are just a *little* less hectic those first few weeks. This past weekend I prepared 10 meals that are ready to heat and eat!

I keep a file of freezer-friendly, somewhat healthy, slow cooker meals that I chose from and picked out a few other meals that the girls *usually* eat.

This round of meal preparation included:

- Bolognese sauce that was used for:
     - Baked ziti (1 batch split into three containers; 2 for the freezer; 1 for the next day)*
     - Two bags of bolognese to serve over pasta
- Cheese ravioli "lasagna" (basically frozen cheese ravioli layered between marinara sauce and topped with mozzarella)
- Cranberry BBQ chicken *
- Peppers and onions with turkey smoked sausage *
- Chicken cacciatore *
- Jamaican gumbo *
- Ranch pork chops *

* Recipe below


Slow Cooker BBQ Cranberry Chicken
2 lbs boneless chicken breast
¼ cup dried minced onion
1 (16 oz) can whole cranberry sauce
1 cup BBQ sauce (I use Sweet Baby Rays)

Combine all ingredients in a gallon-sized freezer bag. Zip close and place in freezer. When ready to use thaw in fridge overnight. Empty contents into crock-pot and cook on high 3-4 hours or low 6-7 hours.

Slow Cooker Sausage & Peppers

12 oz pkg sausage, cut into 1/2 inch pieces
1 green pepper, diced
1 red pepper, diced
1 small onion, diced
2 garlic cloves, minced
1 can Italian diced tomatoes
1 Tbsp Italian seasoning

Combine all ingredients in a gallon-sized freezer bag, zip close & place in freezer. When ready to use thaw in fridge overnight. Empty contents into crock-pot and cook on low 6-8 hours or high for 3-4 hours. Serve over rice.

Chicken Cacciatore 
1 lb chicken tenderloins
1 (26 oz) jar of chunky vegetable-style spaghetti sauce
1 zucchini, chopped
1 yellow squash, chopped
1 green pepper, chopped
1 sweet onion, chopped

Place all ingredients in a resealable gallon-sized freezer bag and mix together. When ready to eat, remove from freezer and thaw in fridge for overnight - 24 hours. Cook on low for 6-8 hours or high for 3-4 hours. Serve with cooked spaghetti noodles and garnish with cheese.

Jamaican Gumbo 
4-6 boneless, skinless chicken thighs (whole or cut into pieces)
12 oz andouille or smoked sausage, sliced
1 yellow bell pepper, diced
1 red bell pepper, diced
3 stalks of celery, diced
1/2 a medium onion, diced
2 cloves of garlic, small diced or grated
14.5 oz can diced tomatoes
2 tablespoons Jamaican jerk seasoning blend

Place all ingredients in a resealable gallon-sized freezer bag. Mix together and zip bag closed. When ready to eat, remove from freezer and thaw in fridge overnight - 24 hours. Cook on low for 6-7 hours or high for 3-4 hours.

3-Ingredient Slow Cooker Ranch Pork Chops 
4-6 uncooked pork chops
1 envelope of dry ranch dressing mix
2 cans cream of chicken soup 

To prepare right away: Put all ingredients in slow cooker and cook on low for 4-6 hours.

To freeze: Put all ingredients in gallon size freezer bag. To prepare, thaw overnight, then pour everything into the slow cooker and cook on low for 4-6 hours. 

Monday, March 28, 2016

Deviled egg diva

We didn't make it to Pittsburgh this Easter, but I brought a little Pittsburgh to us by making Mike's favorite side dish, deviled eggs. Turns out he had to fight for his fair share after this little (big) girl realized she loved them too!


Thursday, February 26, 2015

What's cookin': Braised short ribs

P-Dub has never steered me wrong and I had success with another one of her recipes this past weekend after we enjoyed a date night "in." After last week's fail (on Mike's part) that included the smoke detectors going off not once, but twice, this was a sweet redemption, literally, as we enjoyed chocolate cream pie for dessert.


Braised short ribs

Ingredients
  • 6-8 whole Beef Short Ribs
  • Salt and Pepper To Taste
  • 1/4 - 1/2 cup All-purpose Flour
  • 6 pieces Pancetta or Bacon, Diced
  • 2 Tablespoons Olive Oil
  • 1 whole Medium Onion, Diced
  • 3 whole Carrots, Diced
  • 2 whole Shallots, Peeled And Finely Minced
  • 2-3 garlic gloves, minced
  • 2 cups Red Or White Wine
  • 2 cups Beef Or Chicken Broth (enough To Almost Cover Ribs)
  • 2 sprigs Thyme
  • 2 sprigs Rosemary

Preparation Instructions

Salt and pepper ribs, then dredge in flour. Set aside.
In a large dutch oven, cook pancetta over medium heat until complete crispy and all fat is rendered. Remove pancetta and set aside. Do not discard grease.
Add olive oil to pan with the pancetta grease, and raise heat to high. Brown ribs on all sides, about 45 seconds per side. Remove ribs and set aside. Turn heat to medium.
Add onions, carrots, and shallots to pan and cook for 2 minutes. Pour in wine and scrape bottom of pan to release all the flavorful bits of glory. Bring to a boil and cook 2 minutes.
Add broth, 1 teaspoon kosher salt, and plenty of freshly ground black pepper. Taste and add more salt if needed. Add ribs to the liquid; they should be almost completely submerged. Add thyme and rosemary sprigs (whole) to the liquid.
Put on the lid and place into the oven. Cook at 350 for 2 hours, then reduce heat to 325 and cook for an additional 30 to 45 minutes. Ribs should be fork-tender and falling off the bone. Remove pan from oven and allow to sit for at least 20 minutes, lid on, before serving. At the last minute, skim fat off the top of the liquid. (Can also refrigerate mixture, then remove solid fat from the top.)
Serve 2 ribs on bed of creamy polenta (or mashed potatoes), spooning a little juice over the top.

Wednesday, January 28, 2015

What's cookin': Jamaican Gumbo

Wow, I haven't posted a new recipe on almost a year and a half ... it's not because I haven't been cooking, it's because I've been cooking for a toddler and a preschooler and I'm pretty sure y'all know how to make mac n cheese.

Before kids I knew that the dinnertime routine would change as I started to cook for a family, but I had no idea how much. When we started to think about finger foods with Anna, I heard several people talk about how "my child eats everything we eat with no exceptions."

I've since realized they were blatantly lying. Their pants are definitely on fire somewhere!

Over the past three years, I've found myself making meals, side dishes, and dish modifications I would have gawked and scoffed at pre-kids. Sometimes your priority becomes getting calories into your kids body and if it happens to be relatively healthy, that's a bonus. We've found that appetites and preferences ebb and flow ... if a child likes something one day, enjoy, because chances are they will hate it tomorrow.

Literally tomorrow, usually when you send leftovers for lunch.

Anyway, I digress.

I went to a freezer meal workshop almost a year ago and although some of the recipes turned out to be duds, this one was a hit and graced our kitchen again a few weeks ago. The recipe called for stovetop preparation, being the rebel that I am, I threw the ingredients in the crock pot partially frozen in the morning and came home to a delicious dinner 8 hours later.


Jamaican Gumbo

4 boneless, skinless chicken thighs (whole or cut into pieces)
12 oz andouille or smoked sausage, sliced (I use smoked turkey sausage)
1 yellow bell pepper, diced
1 red bell pepper, diced
2-3 stalks of celery, diced
1/2 medium onion, diced
2 cloves of garlic, small diced or grated
14.5 oz can diced tomatoes
2 tablespoons Jamaican jerk seasoning blend
Cooked white or brown rice (slow cooker preparation)
3/4 c rice and 3/4 water (stove top preparation)

Slow Cooker instructions: Combine all ingredients except rice in your slow cooker and cook on low 6-7 hours. Shred chicken thighs with two forks if cooked whole. Serve over cooked rice.

Stovetop instructions: Combine all ingredients except rice in a large skillet or dutch oven and turn to medium-high heat and bring to a boil. Add rice and water, return to a boil. Turn to low, cover, and cook for 25-30 minutes or until rice is tender and liquid is absorbed.

Suitable for advance preparation: Throw all of the ingredients other than the rice in a freezer-friendly zip-top bag, double bag and lay flat to freeze. Thaw for 12-24 hours and prepare as instructed above.

Sunday, September 22, 2013

What's Cookin': Double Chocolate Zucchini Muffins

I haven't posted a new recipe in a looooonngggg time, but that doesn't mean I haven't been cooking, it's just that our meals have been a little more utilitarian lately and less post-worthy.  We have a healthy, usually homemade, meal on the table and we eat as a family each evening, but when catering to the taste buds of a toddler, combined with a total of 20 minutes to prepare your meal, you tend to go with what's tried and true. That doesn't mean I haven't stopped looking and bookmarking, though.  I coworker turned me onto Iowa Girl Eats some time ago and I've come to love her recipes and tips.  Most of her recipes are straightforward and healthy and her Friday Favorites will make your mouth water.  With the farmer's market brimming with zucchini and before pumpkin baking season is in full swing, I got the hankering to try these muffins the day she posted.  Enter Monday Night Football and a house that was relatively in order, and I got my baking on ... and boy did it feel good!  Yoga, cleaning and baking/cooking are my therapy these days : )

These muffins were a hit with everyone in the family, husbands, Mommies and toddlers alike ... and chocked full of zucchini to boot!  If you haven't tried the good 'ol substitution of unsweetened applesauce for oil in your baking recipes, then you're missing out.  I've been doing it for years and no one is the wiser, except my waistline; the results are moist and delicious without the fat.  So, If you've got zucchini handy, or have a farmers market close by, give these muffins a try!


Double Chocolate Zucchini Muffins
From Iowa Girl Eats

Makes 22 muffins, 5 Weight Watcher points plus per muffin
Ingredients: 
1/2 cup (1 stick) butter, at room temperature
1/2 cup unsweetened applesauce
1 cup sugar
2 eggs
1 teaspoon vanilla
1/2 cup buttermilk *
2-1/2 cups flour
1/4 cup cocoa powder
1 teaspoon baking soda
1/2 teaspoon baking powder
1/2 teaspoon salt
2 cups shredded zucchini
1 cup chocolate chips
Directions:
Preheat oven to 325 degrees. Line a muffin tin with liners then lightly spray with nonstick spray. Set aside.
Beat butter, unsweetened applesauce, and sugar in a large mixing bowl. Mixture will look curdled. Add eggs then mix to combine. Add vanilla and buttermilk then mix to combine.

In a separate bowl stir together flour, cocoa powder, baking soda, baking powder, and salt. Add dry ingredients to wet ingredients in 3 batches, mixing until just combined before adding the next batch. Add zucchini and chocolate chips then mix until just combined.

Scoop batter into liners filling 3/4 of the way full. Bake for 15-17 minutes or until a toothpick inserted into the center comes out clean. (Mine took closer to 22 - 25 minutes) Let cool in muffin tin for 3 minutes then remove to a cooling rack to cool completely.

* I never seem to have buttermilk on hand when needed, so I usually make sour milk by following these steps: Use the same amount of sour milk as buttermilk. For each 1 cup of sour milk, place 1 tablespoon lemon juice or vinegar in a glass measuring cup.  Add enough milk to make 1 cup total liquid; stir. Let the mixture stand for 5 minutes  and stir before using.  

Friday, December 7, 2012

What's Cookin': Old fashioned sugar cookies

I recently found a new food blog that I'm loving and love the idea of the Clara Project and trying out old recipes.  One of the first recipes I read on the site was for the the old-fashioned sugar cookies and I immediately thought they'd be great for holiday exchanges, or any time of year with the right cookie cutter, but wanted to give them a try before making them for mass consumption.  Luckily my good friend Amber was a willing participant in the trial run.  The first batch turned out OK, but needed to be baked a minute or two less, and I wasn't in love with the idea of using shortening.  Round two included butter and less bake time, and bingo, just what I was looking for, a simple, easy-to-decorate, classic cookie.  Almost every recipe posted to this site spikes my interest and I'm excited to try out this recipe, this recipe, and this recipe next. 


Best crispy old-fashioned sugar cookies
From writes4food


1/4 cup shortening or butter (I prefer butter)
2/3 cup granulated sugar
1 egg, lightly beaten
1 Tbsp. milk
1/2 tsp. pure vanilla extract
1/2 tsp. pure almond extract
1 3/4 cup all-purpose flour
1 1/2 tsp. baking powder
1/4 tsp. salt
1 egg white whisked with 1 tsp. water for finishing
granulated or decorative sugar for finishing

In the bowl of a stand mixer (or in a bowl and using a hand mixer), cream together shortening and sugar until light and fluffy, about 2 minutes. Add the beaten egg and mix to combined; add milk and extracts and stir to combine thoroughly. Sift together the flour, baking powder and salt and add to the mixing bowl; stir to combine well. Transfer the cookie dough to a sheet of waxed paper or plastic wrap, cover and refrigerate for about 30 minutes.

Preheat oven to 350 degrees; spray a cookie sheet lightly with cooking spray, or line with parchment paper. Divide dough in half and roll out one half to about 1/8-inch thick (keep the other refrigerated until ready to use). Cut out shapes with a cookie cutter dipped in flour; transfer cookies to the baking sheet about 1/2 inches apart. Brush the cookies lightly with egg white and sprinkle generously with granulated or decorative sugars. Bake for 12 to 14 minutes, until edges are very lightly brown. Remove baking sheet from the oven and let it sit for 1 minute before transferring cookies to a baking rack to cool.

Friday, November 30, 2012

What's Cookin': Thanksgiving favorites

We alternate Thanksgiving and Christmas between my family in Lexington and Mike's family in Pittsburgh.  Although we're blessed with wonderful and welcoming families, it's always hard to be away from your own family and traditions on any given holiday, so this year I hosted "Pre-Thanksgiving" for my side of the family in Cincinnati the weekend before we left for Pittsburgh.  We hosted seven adults and two children and the menu included a roasted turkey breast, green bean casserole, corn pudding, sweet potato casserole, stuffing / dressing, gravy, and cranberry sauce (out of a can due to popular demand), rolls, Paula Deen's pumpkin pie, and chocolate cream pie.  My Mom provided guidance (and baby-sitting!) during most of the prep as this was my first big solo meal, and everything went off without a hitch.  Of course it didn't hurt that I was using tried-and-true recipes from years of practice.  If full bellies were any indication, I'd say the meal was a success and I hope this becomes a tradition with both sides of our family.

Perhaps one of the best parts of the day and the icing on the cake was Anna having a chance to play with her cousin, Aiden.  It took a bit for Aiden to warm up to Anna's "in your face" welcoming nature, but when he did, they literally ran circles around the house for an hour and had a blast playing with one another all afternoon and into the evening.  I love holiday food, but I love the fact that holidays gather family even more!


I love, love, love how the turkey turned out, it was quite possibly the best turkey I've had, ever (if I do say so myself), and I was pretty proud that I carved it myself.  I've copied the full recipe below, but I took a few shortcuts using dried herbs, and also chickened-out (or would it be turkeyed-out?) in regard to putting any of the mixture under the skin; I think I'll try that when I'm not cooking for a crowd.  The corn pudding recipe is a family tradition that my Mom has been making since I was born.  It's so, so, so, so good.  And super easy.  I hesitate to even post it here, but it deserves to be shared with the world, aka my 12 readers : )

Herb-Roasted Turkey Breast
Courtsey of Ina Garten
n
1 whole bone-in turkey breast, 6 1/2 to 7 pounds
1 tablespoon minced garlic (3 cloves)
2 teaspoons dry mustard
1 tablespoon chopped fresh rosemary leaves
1 tablespoon chopped fresh sage leaves
1 teaspoon chopped fresh thyme leaves
2 teaspoons kosher salt
1 teaspoon freshly ground black pepper
2 tablespoons good olive oil
2 tablespoons freshly squeezed lemon juice
1 cup dry white wine

Preheat the oven to 325 degrees F. Place the turkey breast, skin side up, on a rack in a roasting pan.

In a small bowl, combine the garlic, mustard, herbs, salt, pepper, olive oil, and lemon juice to make a paste. Loosen the skin from the meat gently with your fingers and smear half of the paste directly on the meat. Spread the remaining paste evenly on the skin. Pour the wine into the bottom of the roasting pan.

Roast the turkey for 1 3/4 to 2 hours, until the skin is golden brown and an instant-read thermometer registers 165 degrees F when inserted into the thickest and meatiest areas of the breast. (I test in several places.) If the skin is over-browning, cover the breast loosely with aluminum foil. When the turkey is done, cover with foil and allow it to rest at room temperature for 15 minutes. Slice and serve with the pan juices spooned over the turkey.

Corn Pudding
Courtesy of Patricia Miller's kitchen

1 can cream corn
2 cans whole kernel corn, drained
1/2 cup sugar
1/2 cup flour
1/2 stick of butter, melted
3/4 to 1 cup heavy cream or half and half
2 eggs, separated

Mix the corn, sugar, flour, butter and two egg yolks in a greased casserole dish. Beat the egg whiles until they form stiff peaks. Fold in egg whites to corn mixture, very gently. Bake at 400 degrees for 15 minutes, then lower oven to 300 degrees for 1 hour, alternatively, bake at 350 degrees for a little over an hour, or until set.  Let rest for at least 10-15 minutes before serving. 

Sunday, November 4, 2012

What's Cookin': Loaded Baked Potato Soup (Slow Cooker)

I knew on Halloween night it would be nice to have an easy, hot dinner ready to go before our neighborhood Halloween parade started at 5:30 and considering it was going to be a COLD night, I thought this hearty soup would fit the bill perfectly.  It doesn't get easier than this, folks. My only warning is that the recipe makes A LOT, which makes me feel better about the butter and cream.  I'll probably cut the recipe in half the next time I make it for just our family, unless the leftovers I freeze thaw well.  I like that you can add toppings you please and just love the creamy texture.  I even mixed peas and carrots into Anna's bowl, a sneaky way to get more veggies into to diet ; )  I have a feeling this will lead to many a winter root vegetable soup in our house, up next squash and sweet potatoes : )


Loaded (Slow Cooker) Baked Potato Soup
From The Crockin' Girls

6 Large Potatoes, peeled and cubed
1 Large Onion, diced
1 Quart Chicken Broth
3 Garlic Cloves, minced
1/4 Cup Butter (just throw half a stick-ish in the crock)
Salt and Pepper to taste
1 Cup Cream (I used half and half)
1 Cup Shredded Sharp Cheddar Cheese (I used mild cheddar)

Directions
Combine all ingredients except for cream/ half and half, and cheese in your slow cooker.
Cook on high for 4 hours or low for 8 hours (potatoes should be tender).
Mash potatoes until coarsely chopped and soup is slightly thickened (I used my immersion blender).
Stir in cream and cheese and keep warm until ready to serve. Garnish with toppings (bacon, chives, sour cream, cheese).

Friday, October 26, 2012

What's Cookin': Italian Meatloaf and Mac 'n' Cheese

Given that we all get home from work roughly around 5:00pm and eat dinner at 6:00pm so that we can make Anna's bedtime of 7:00pm-ish, dinner has literally turned into a mad dash to the finish most nights.  I shop on Saturday or Sunday, and I've always chopped/ prep anything I can that day so that it's ready the night of meal preparation, and have a focus now on meals that can be made in advance, using our slow cooker, and "cooking once, eating twice."  That said, if our schedule permits, I try to cook what I call a "big meal" on Sunday.  This past week that entailed meatloaf, mac 'n' cheese, and sauteed zucchini.  But, not just any meatloaf, italian meatloaf ... basically a big meatball ... and not just any mac 'n' cheese, a relatively healthy version of the dish that I make for Anna often.  I didn't realize until we were sitting down to eat that this is one of Mike's favorite meals and now I feel bad for not adding it to the rotation more often. 

I found the meatloaf recipe via Michael Chiarello on the Food Network waaaaay back in 2006 when I had time on Saturday mornings to sit and peruse cooking shows before getting my day started.  I now record PW's show and get excited when I happen to see an episode of Barefoot Contessa, but otherwise there's not a ton of cooking TV in my life right now, unless you count Diners Drive-ins and Dives that we somehow get sucked into almost every Friday night.  The mac 'n' cheese comes from my Betty Crocker Healthy New Choices cookbook that I bought years ago, and it's one I'd recommend over and over.  I think I'm accidentally raising a vegetarian ... Anna just doesn't really like meat ... we use a lot of whole grain pasta and cheese and attempt beans to get her protein, so, mac 'n' cheese is a staple in her diet.  I feel better that this version doesn't pack nearly as much fat as other recipes, I can control the ingredients, I can use the pasta of my choosing, AND, I can load it with veggies so that it's a complete meal.  OK, that's enough on the back stories, here are the recipes:

Italian Meatloaf
Adapted from:  Michael Chiarello on the Food Network

2 tablespoons extra-virgin olive oil
1 red pepper, seeded, small diced
1 onion, small diced
3 cloves finely chopped garlic
1 pound ground beef
2 eggs
3/4 cup bread crumbs (I use italian breadcrumbs)
1 cup grated Parmesan
1 tablespoon Worcestershire sauce
1 tablespoon balsamic vinegar
2 tablespoons chopped basil leaves
1 tablespoon chopped parsley leaves (optional, I hardly ever have parsley)
1 teaspoon salt
1/2 teaspoon black pepper
1 cup marinara sauce (plus a little more for serving)

Preheat oven to 350 degrees F.

Heat 1 tablespoon of the olive oil in a medium saute pan over medium heat and add the peppers, onions and garlic. Saute until just soft, remove to a plate and cool.  (Don't skip this step, this allows the veggies to sweat out most of thier liquid and keeps your meatloaf from becoming a totally soggy mess.  I did this early in the morning and put the mixture in the fridge until I was ready to mix the remaining ingredients)

When the peppers and onions are cool, combine all of the remaining ingredients together except for the marinara. Pack the meat mixture into an oiled loaf pan, if you don't have a loaf pan, form the meat mixture into a loaf shape on an oiled oven tray or baking dish. Top with the marinara, making sure to spread evenly over the top.  (I mixed the meatloaf in the early afternoon and kept covered in the fridge until ready to cook and spread the marinara on top right before placing in the oven)

Bake for approximately 50 to 60 minutes or until an instant-read thermometer registers 160 degrees F in the middle of the meatloaf. Remove from the oven and let rest for 5 minutes. Slice and serve with extra marinara sauce on the side.

Sauteed onions, red pepper and garlic ... is there anything better?!?!

The prime suspects

Excuse the fact that the food is not "perfectly staged" ... it sure tasted perfect!

Easy Mac 'n' Cheese
Slightly adapted from:  Betty Crocker's Healthy New Choices

8 oz pasta (we love Barilla's mini wagon-wheels for Anna)
1 cup skim milk
1 T  butter
2 T all purpose flour
1/4 t salt
1/4 t pepper
1 c shredded cheese (I use mild cheddar)

Cook and drain pasta according to package directions.

Combine milk, flour, butter, salt and pepper in a saucepan and heat to a low boil, stirring with a whisk constantly.  Boil and stir 1 minute.  Stir in cheese until melted.  Add pasta and stir until hot.  (If making for Anna I load it up with peas or other veggies as well!)

Optional breadcrumb topping:  Place pasta in a casserole dish.  Combine 1/2 c italian breadcrumbs and 1 T melted butter, stir with a fork until combined.  Heat at 350 degrees until lightly browned. 

Wednesday, October 17, 2012

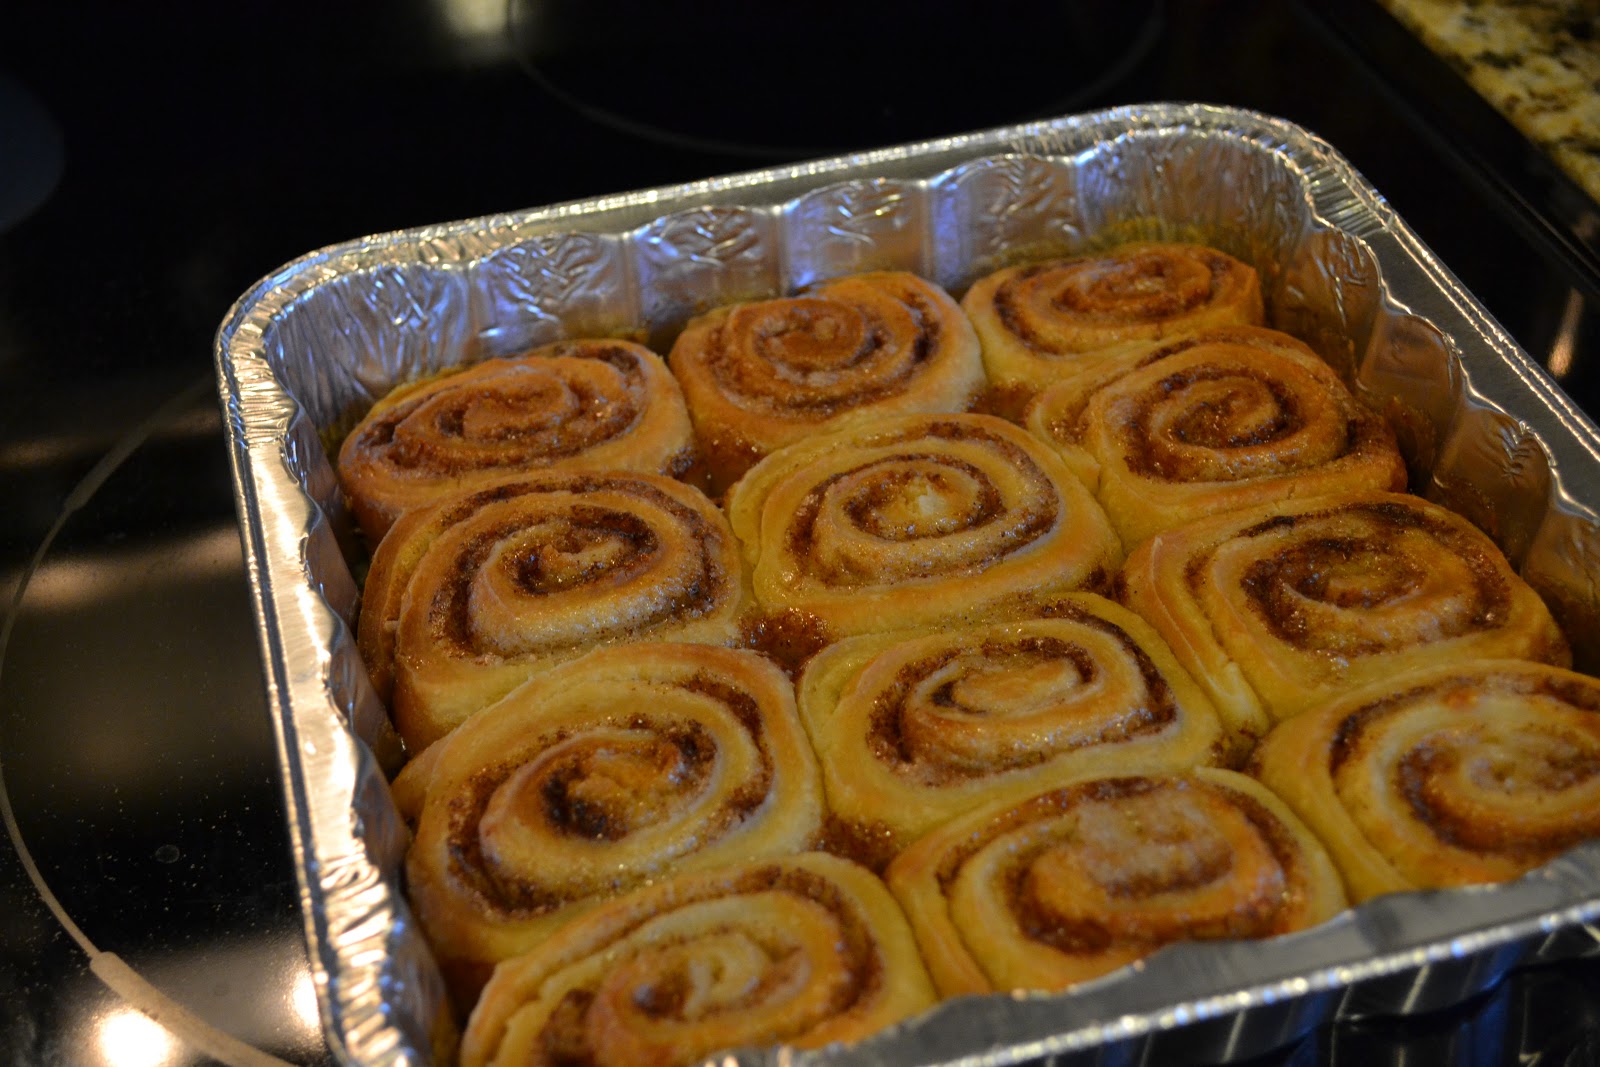
What's Cookin': PW's Cinnamon Rolls

It's officially fall, I'm pregnant and wearing maternity pants, the next logical step here is to make cinnamon rolls.  Might I suggest The Pioneer Woman's recipe?  I'd seen her recipe referenced all over the internet, but Amber's post gave me the confidence to finally try it for myself.  I made a half a batch a month or so ago and we walked away with four pans, one of which is still waiting to be enjoyed in the freezer ... sadly, I've never managed to get a picture with the iced and final product ... they're just too good : )  And, speaking of the icing, I usually don't follow PW's recipe, I prefer good old powered sugar and a little whole milk mixed together, warmed and drizzled over the top ... yummmmm!


Friday, August 17, 2012

What's Cookin': Honey-Gingered Pork Tenderloin

You know a dish is going to be good when you realize two differnt people have given you the recipe.  I first encountered this recipe when Mike's Mom made it for us during a visit to Pittsburgh, it was delicious!  When planning the fare for Anna's baptism lunch I knew the oven would be working overtime on side dishes and delegating the main dish to the grillmaster was a great choice.  As I was preparing for the big day, I also realized this same recipe had been given to me as part of my baby shower "stock the kitchen" recipe collection by my friend Danielle, and immediately patted myself on the back in advance. 

We served 14 people that day, so I doubled the recipe and used four 1+ pound tenderloins.  The menu that day also included three side dishes and rolls, but were no leftovers of the tenderloin.  Given the picky eaters that arise between my family and especially Mike's family, this speaks volumes.  The best part about this easy recipe is that you can reserve one tenderloin and freeze it for later use, marinade and all!  And you know how I like to cook once and eat twice ; )

When I made the recipe a few weeks ago, Mike was in love.  I reminded him we'd had the same dish for Anna's baptism and asked if he didn't remember doing all of the grilling that day.  He responded, "well, it was kind of a crazy day" ... that's an understatement given we had to coordinate 4 in-house guests (one of which was a new girlfriend we'd never met, hello, put away the crazy and act presentable), a baby's nap schedule, a cermony at church that put us front and center, and hosting and then feeding a crowd of 14.  Oh yeah, and Uncle Brian lost his keys, so most of the afternoon was spent on a wild goose chase.  Long story short, I don't think he'll be forgetting anytime soon and this has joined our regular rotation. 


(Taken the day I ate this as leftovers for lunch ... health(ier) mac n cheese recipe to come!)

Honey-Gingered Pork Tenderloin

2 (3/4 to 1 lb) pork tenderloins
1/4 c. honey
1/4 c. soy sauce
1/4 c. oyster sauce (in the Asian section of your grocery store)
2 T. brown sugar
1 T. plus 1 t. minced fresh ginger root
1 T. minced garlic
1 T. ketchup
1/4 t. onion powder
1/4 t. red pepper  (I didn't have this on hand, so it was omitted)
1/4 t. ground cinnamon

Combine all ingredients in a gallon-size zip-top freezer bag.  Add tenderloins and double bag if you'd like (I'd recommend this!).  Let marinade 8 hours or overnight. 

Remove tenderloins* from the marinade, reserving the marinade.  Grill over medium-hot coals for approximately 25 minutes, turning often and basting with the reserved marinade.  Pork is done when a meat thermometer inserted into the thickest portion of the tenderloin registers 150 degrees. 

*  To freeze one tenderloin for later use:  Remove one tenderloin and a small amount of the marinade, cook as directed.  Freeze the other tenderloin, in the marinade, and thaw overnight before cooking. 

Friday, May 4, 2012

What's Cookin': Cook Once, Eat Twice (or more!)

This may not be a new idea to my readers, but since I just thought of cooking this way a few months ago, I figure it's worth a post.  Remember here, here and here where I made these casseroles?  They're all delish, but they make enough to feed an army!  I love leftovers as much as the next person, probably more because of my thrifty nature, but there are only so many days you can eat the same meal for lunch or dinner (or both).  A few months ago a light bulb went off as I was making a baked ziti to take to a friend.  I'd portioned out the ziti into three casserole dishes, one that was just enough for her family, and two for us, one to eat the next day, one to freeze ... so, why not do that with all the larger casseroles I make?  Instead of one ginormous 9x13, I've started making two (or three) smaller 8x8 casseroles ... one to eat right away and one to freeze for a super easy weeknight meal ... or to pull out when a neighbor or friend is in need and your week doesn't allow for an extra meal to be cooked.  Easy peasy! 

The three I've linked above all freeze very well; the rules of thumb you'll want to follow are to double line with foil, label, use within 4-6 months and then thaw overnight or in a cold water bath the day of cooking.  I'd generally recommend you cook the dish covered with foil for half the cooking time and uncovered the other half (generally 40 - 45 minutes) ... or until warmed through and you just can't wait any longer : )

Sunday, April 22, 2012

What's Cookin': Black Bean Burgers

I'm by no means a vegetarian, nor do I think I ever could be (except for that one Lent 11 years ago when I gave up meat) ... ut, there are many days I don't eat meat and don't miss it.  I think any carnivore can agree that a burger is just better when there's a little fat involved.  You need juices when you have a burger.  That said, I love to find healthier alternatives to the many nights during the summer that we decide to grill out and Mike wants a burger.  I love a good turkey or chicken burger, but I also love a good black bean burger and had never tried my hand at making them until a few weeks ago.  I didn't realize until I was pattying them up that Mike had never tried a BBB ... (come on, did you thnk I'd leave that acronym hanging?).  Gasp.  Seriously??  As he stood there and watched the process I was saying a silent prayer that these turn out successfully.   

And, boy, did they! 

Stop the presses and make these burgers immediately.  They were the cat's meow, the bees knees, the creme de la creme of black bean burgers!  We topped ours with provolone cheese, a ripe tomato slice and avocado, none of which hurt the cause.  I have three patties in the freezer and I hope they thaw and cook up as good as the fresh batch ... I'll keep you posted.  And, the best endorsement I can give you came from Mike when he said "these aren't bad, I wouldn't mind having one again."  : )

That there is a baked sweet potato next to my burger, I may be a *tad* obsessed with them of late : )

Black Bean Burgers
as adapted from Annie's Eats

¾ cup seasoned breadcrumbs
1 T EVOO
2 (15 oz.) cans black beans, drained and rinsed, divided
2 large eggs
1 tsp. ground cumin
½ tsp. salt
¼ tsp. cayenne pepper
1 red bell pepper, stemmed, seeded and finely diced (I had a green pepper on hand)
¼ cup fresh cilantro, minced  (omitted ... I am NOT a fan of cilantro)
1 shallot, minced

Place 2½ cups of the beans in a large bowl and mash with a potato masher or a fork until mostly smooth. In a separate bowl, combine the eggs, 1 tablespoon of the oil, cumin, salt and cayenne. Whisk to blend. Add the egg mixture, toasted panko, the remaining ½ cup beans, bell pepper, cilantro and shallot to the bowl with the mashed beans. Stir together until evenly combined.

Divide the mixture into 6 equal portions, about ½ cup each. Lightly pack into 1-inch thick patties. (At this point the patties can be covered tightly with plastic wrap and refrigerated for up to 24 hours before cooking.) Heat the oil in a large skillet over medium heat until shimmering. Carefully lay half of the patties in the skillet and cook until well browned on both sides, about 8-10 minutes total. Transfer the cooked burgers to a plate, tent with foil, and repeat with the remaining oil and bean patties. Serve warm.

Saturday, April 21, 2012

What's Cookin': Slow Cooker Stuffed Peppers

I'm pretty sure you didn't grow up in America if your Mom didn't make stuffed peppers when you were a kid, so this is a recipe I was anxious to try in my slow cooker.  I've been trying to use my slow cooker once a week to ease the burden of weeknight chaos, it sure is nice to have a hot meal ready when you walk in the door.  As an added bonus, I love a good "one dish, one plate wonder" where you get veggies, protein and carbs in one neat little package, and this fits the bill on all accounts.  I must have read this recipe (in the companion book to the blog) four times to make sure I didn't need to pre-cook the meat, but alas, I didn't, and the peppers were DE-lish!  You could easily make and refrigerate the filling the night before, or assemble the entire dish and store your stoneware in the fridge until morning ... and of course, you can adjust to add your taste in spices, flavoring, etc.  Happy crockin'!!


Slow Cooker Stuffed Peppers
as adapted from A year of Slow Cooking

5 to 6 peppers of any color
1 lb lean ground beef (or turkey)
1 cup cooked rice, brown or white
1 14 oz can fire roasted tomatoes
1 t worcestershire sauce
2 T ketchup
1 t black pepper
2-3 cloves of garlic, minced (my addition)
1/3 cup water  (next time I'd use a tomato sauce for additional flavor)

Wash and trim your peppers, removing the inner seeds and membranes, and saving the tops of the peppers. 

In a bowl, mix the ground beef, rice and seasoning. Stuff each pepper with a good amount of the ground beef and rice mixture.

Nestle the peppers into your slow cooker and put the little pepper tops back on.  Pour in 1/3 cup of water ( or tomato sauce ) around the bases of the peppers

Cook on low for 6-8 hours.

Thursday, February 2, 2012

What's Cookin': Linguine with Clam Sauce

A few years ago on the ski trip (where we don't ski), Amber and I planned to offer a vegetarian option on pasta night, but like usual there were mass amounts of food, and another dish literally wouldn't have had a serving plate to stand on.  Amber had sweet-talked her mother into handing over the recipe to begin with, so I think I may have been sworn to secrecy regarding the fact that she shared with me.  I can't remember exactly, and honestly this recipe is too delicious, way too easy, and soooo affordable that I'd feel guilty not sharing with my six readers.  Notice I didn't throw healthy into the description, scroll down and read the recipe and you'll see why.  Everything in moderation, right?  Throw a salad into the mix like we did and you'll get your greens.  Use whole grain pasta, like we did, and you'll get an extra dose of fiber and protein in your day.  After you eat this dish, I promise you won't care about the extra calories. 


Nothing smells better than EVOO, butter, and garlic cooking!

Except maybe this finished sauce, waiting for noodles!

Y-U-M-MMMMMMMMMMM! 
I forgot the fresh parsley at the store ... it bugged me that the plate lacked
something green, but I powered through and ate it anyway ; )

Linguine with Clam Sauce

1 pound linguine noodles, fresh is best (we used whole grain)
1/3 cup EVOO
1/2 stick butter
3 cloves of garlic, minced (more if you're a garlic lover like me)
4, 6 1/2 ounce cance of minced clams, including their liquid
1 teaspoon dried oregano
1/4 cup chopped parsley (I forgot this, but the dish survived)
dash of red pepper flakes
splash of white wine (optional)
grated Romano cheese

In a large pot of boiling, well-salted water, cook linguine just until tender. 

Meanwhile, in a medium saucepan, heat oil and butter until butter melts.  Add garlic and cook until golden, but watch to ensure it doesn't burn.  Stir in the clams with their liquid, oregano, parsley, red pepper flakes, salt and pepper to taste.  Cook just until heated.  Add a splash (or more) or white wine if you choose. 

Drain linguine, return to the pot, add the clam sauce and cheese and toss until well coated.  Serve with extra cheese and red pepper flakes.

Great with a loaf of oven-hot french bread or garlic bread. 

Notes from Amber's Momma:
-- This recipe easily doubles, triples, etc.  When you get into doubling, tripling, a helpful hint is to open all of the cans of clams first, then start everything else.

-- This recipe is top secret and the Momma-Love ingredient cannot be recreated.  So if your recipe tastes really good, but like a little sumpin' sumpin' is missing - it's the Momma-Love.  (this is soooo true, and why I added the white wine, ha)

-- This recipe will get better with age, i.e. the next day ... good luck having that opportunity.

Thursday, January 26, 2012

What's Cookin': Holiday Treats

Anna's PTO puts on a wonderful luncheon for the teachers each holiday season and asks for volunteers to supply dishes.  Being our first year, I thought long and hard about what I wanted to donate and eventually decided that the way to anyone's heart is through dessert.  I've never made a cheesecake at home, but was intrigued when I saw a recipe for White Chocolate Peppermint Cheesecake Bites in a Kraft Foods e-mail.  My only regret here is that I didn't post this recipe on the blog sooner as to inspire others to bake during the holiday season.  These were VERY easy, EXTREMELY delicious, and received rave reviews; an added bonus is the easy "wow factor" with the garnishes.  I had teachers stopping me in the hall during pickup for days to tell me how much they'd enjoyed the dessert.  That said, I think peppermint lends itself to being a winter dessert idea and there's a strong chance I'll be making these again before Spring : )


White Chocolate Peppermint Cheesecake Bites
Adapted from Kraft Foods

1-1/2 cups Graham Cracker Crumbs
3 Tbsp. sugar
1/4 cup butter, melted
4 pkg. (8 oz. each) Cream Cheese, softened
1 cup sugar
1/4 tsp. peppermint extract
1 cup Sour Cream
4 squares White Chocolate, melted
4 eggs
1cup thawed Cool Whip
Peppermint candies or miniature candy canes, crushed, for use as a garnish

Directions:
Heat oven to 325°F.

Line 13x9-inch pan with foil, with ends of foil extending over sides. Mix graham crumbs, 3 Tbsp. sugar and butter; press onto bottom of pan. Bake 10 min.

Beat cream cheese, 1 cup sugar and extract in large bowl with mixer until well blended. Add sour cream and chocolate; mix well. Add eggs, 1 at a time, mixing on low speed after each just until blended. Pour over crust.

Bake 40 min. or until center is almost set. Cool. Refrigerate 4 hours. Use foil handles to lift cheesecake from pan before cutting to serve. Top each piece with a dollop of Cool Whip and a sprinkle of crushed candy cane.

Yields: 32 cheesecake bites
n
Note:  The recipe called for cutting these into 16 pieces, but I went with 32 instead and it was *just* the right amount for such a rich dessert.  You could easily cut the recipe in 1/2 or 2/3 and make a smaller portion. 


I also made several "batches" of holiday chocolate pretzel bites, a recipe that literally CANNOT be fudged up ... pun intended : )  Preheat your oven to 250 degrees, prepare a baking sheet with miniature pretzels, top each pretzel with a Hershey's Kiss (could also be done with a Rolo candy), bake for 5-7 minutes, until the chocolate is soft, press a M&M candy into the top, and refrigerate until set. 
 
I found inexpensive holiday-themed plates and tins at a local drug store and purchased miniature ornaments to adorn the ribbon used to tie the plate together.  These, along with a card and gift certificate, made wonderful gifts for Anna's teachers.